How to Add a Deceased Loved One to a Photo
There are three ways to add someone who has passed away to a photo: let an AI tool combine two photos for you, do it yourself in a photo editor such as Photoshop, or ask a photo restoration studio. This guide explains each one, how to choose the right photos, and ideas for printing and remembering.
First photo free with an account · then 5 photos for $4.99, no subscription
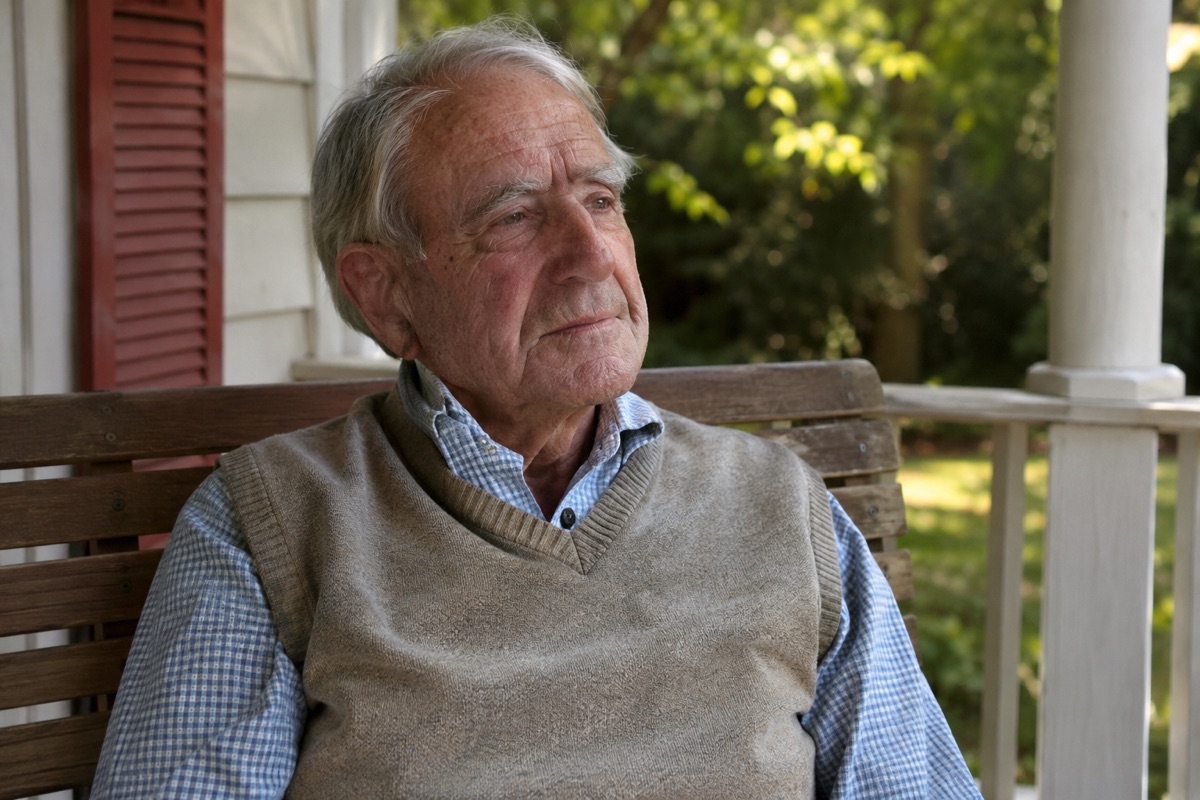
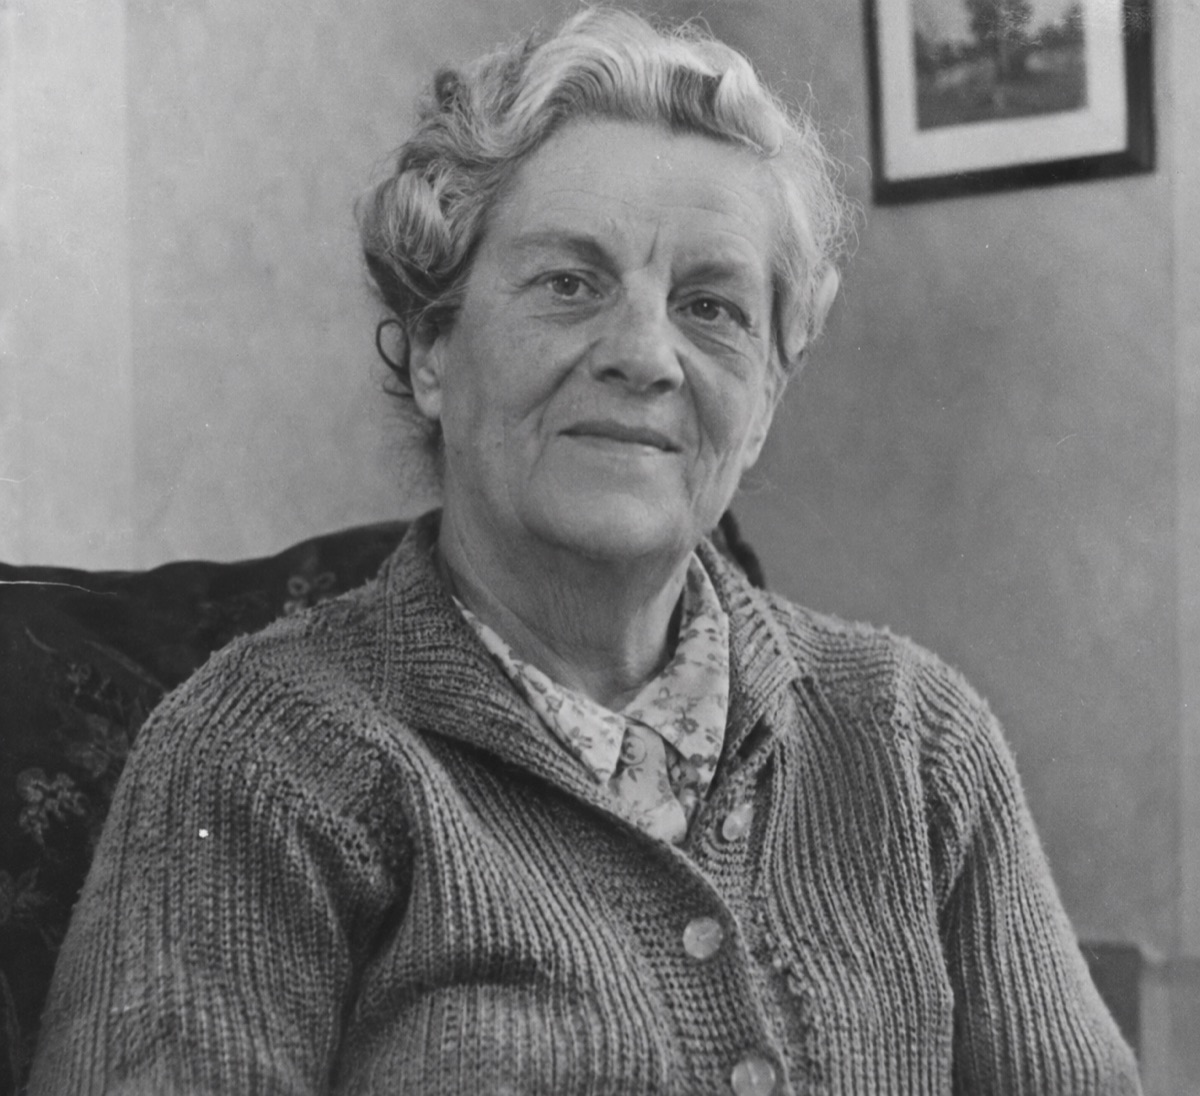
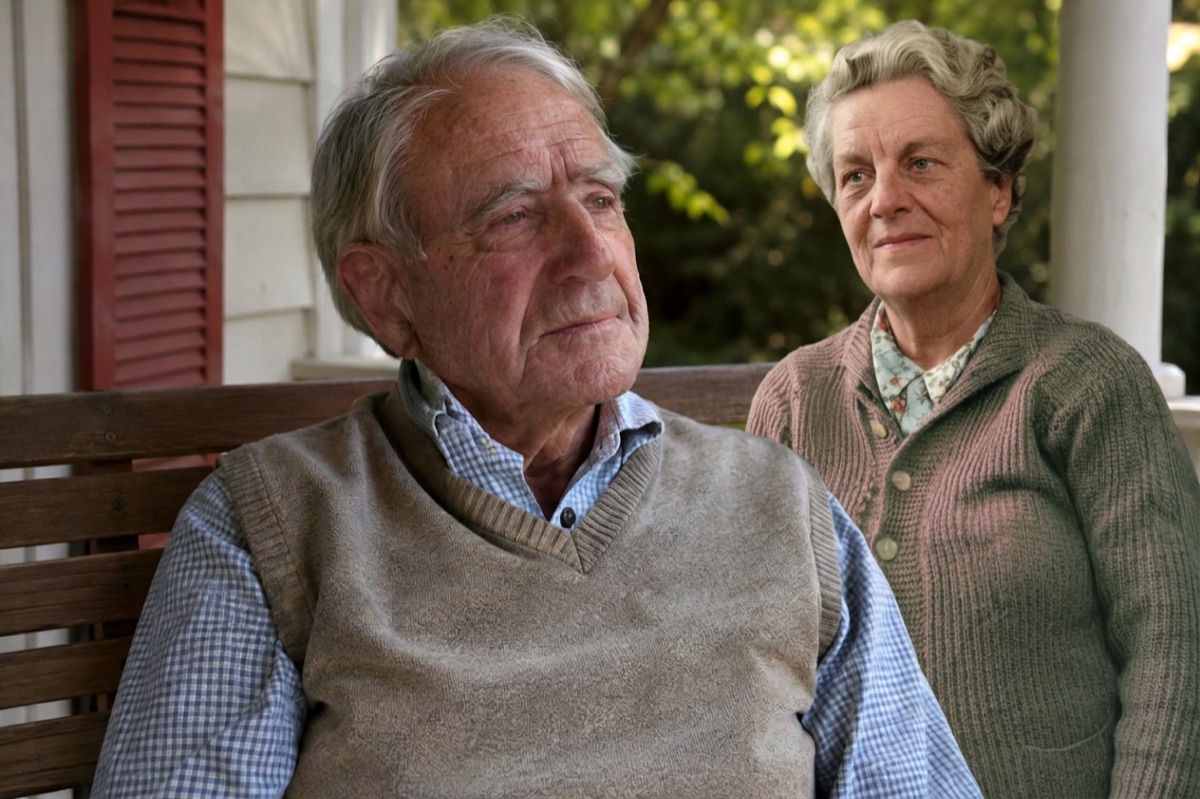
Example
1. The photo to add them to
2. A photo of the loved one
How it works
- Choose the photo you want your loved one to be part of: a family photo, a wedding, a graduation or any everyday moment.
- Add a clear photo of your loved one. An old print you photograph with your phone is fine; black and white works too.
- Press the button. In about a minute you get one new photo with them in it, ready to download, print or share.
Way 1: with this tool (about a minute)
The quickest way is the tool at the top of this page. Upload the photo you want them in and a photo of your loved one. The AI places them into the picture beside the others, gives them a pose and clothing that fit the occasion, and matches the light and color, so it looks like one photo taken on the day. Your first photo is free with an account.
Way 2: by hand in Photoshop, GIMP or Photopea
Doing it yourself gives you full control but takes an hour or more, and some practice. The steps are the same in Photoshop, the free GIMP or the free browser editor Photopea:
- Open the group photo, then open the photo of your loved one in a second tab.
- Select your loved one with the Object Selection or Quick Selection tool, refine the edges around the hair, and copy them.
- Paste them into the group photo as a new layer, then use Free Transform to scale them so their head is the same size as the people next to them.
- Move them so they stand slightly behind or beside someone; a layer mask lets you hide the parts that should be behind another person.
- Match the light: adjust Levels or Curves, then Color Balance or Hue/Saturation until skin tones and shadows match the others.
- If the old photo is black and white, colorize it first (Photoshop has a Colorize neural filter) or turn the whole picture black and white for a classic look.
- Add a soft shadow on the ground or on the person beside them, and add a little noise so the grain matches the rest of the photo.
Way 3: a photo restoration studio
Many photo restoration services and local photographers offer memorial photo composites. They usually cost $30 to $150 per photo and take a few days. It is a good choice for very damaged originals or for large prints where every detail matters.
How to choose the photos
- For your loved one: a clear, sharp photo where the face is large, ideally facing the camera, with even light. Avoid sunglasses, heavy shadows and tiny faces in group shots.
- For the main photo: a picture with some room beside someone, taken in soft light. Very dark party photos and flash-lit night shots are harder to blend.
- Similar angles help. If everyone in the main photo is seen from the front, a front-facing photo of your loved one fits best.
- Age is your choice. You can use a photo from when they were younger, or one from their later years, depending on how you want to remember them.
Matching the light so it looks real
The details that make a combined photo look real are light direction, color and sharpness. If the sun comes from the left in the main photo, the shadows on your loved one’s face should fall the same way. Warm evening light needs warmer skin tones; a sharp phone photo needs a sharp face, while an old film photo needs some grain. Our tool matches these automatically; by hand, compare faces side by side at 100% zoom.
Printing and memorial ideas
- A framed print for the family home, or for the table at a wedding with a small note in their memory.
- A memorial card or a photo for the funeral or celebration of life.
- A page in a wedding album or a family photo book.
- A gift for a parent or grandparent on an anniversary, a birthday or the holidays.
- For printing, use the downloaded file directly; it looks best at up to 5×7 inches.
Questions
- How do I add someone who passed away to a photo?
- You need two photos: the photo you want them in, and a clear photo of the person who passed away. Upload both above, press the button, and in about a minute you get one new photo with your loved one standing or sitting naturally with the others, in matching light and color.
- How do I add a person to an existing photo for free?
- Upload the existing photo as photo 1 and a photo of the person as photo 2. The tool places them into the existing photo and matches the light, so you do not have to cut anything out yourself. Your first photo is free after signing up. You can also do it by hand for free in GIMP or Photopea with the steps in this guide.
- What is the best free app to add a deceased loved one to a photo?
- Most "free" apps let you try a few edits and then ask you to subscribe. Here the first photo is free with a confirmed account and nothing needs to be installed: it works in the browser on iPhone, Android and computers. If you want to do it entirely by hand for free, GIMP or Photopea can cut a person out of one photo and blend them into another, which takes more time and practice.
- Is it okay to add someone who has died to a photo?
- Many families find comfort in it, especially for moments the person would have loved to be part of. It can help to tell close family before sharing the photo widely, and some people like to add a small note that it was made in memory.
- How much does the tool cost?
- Your first photo is free when you create an account and confirm your email. After that, photos come in one-time packs: 5 photos for $4.99, 15 for $9.99 or 40 for $19.99. One credit is one photo. There is no subscription, and you can also buy a pack without creating an account.
- What happens to the photos I upload?
- Your photos are only used to make your picture. They are kept private, are never shown to other visitors and are deleted automatically after 30 days. You can delete your account at any time.
More about adding a loved one to a photo
- Add Deceased Loved One to PhotoAdd a deceased loved one to a family, wedding or graduation photo. Upload two photos and get one natural, realistic picture together. First photo free.
- Add Deceased Loved One to Photo with AI, FreeAdd a deceased loved one to a photo with AI for free: create an account, confirm your email and your first photo is on us. No app, no subscription.
- Add Deceased Loved One to Photo AppAn add deceased loved one to photo app that works in your phone’s browser on iPhone and Android. Pick two photos from your camera roll, no install needed.
- Add Deceased Loved One to Photo AI PromptA copy-and-paste AI prompt to add a deceased loved one to a photo in ChatGPT or Gemini, with tips for natural results, plus a free tool that does it for you.
Your photos are safe with us
Your photos are only used to make your picture, are never shown to anyone else and are deleted automatically after 30 days. Photos of public figures and explicit content are refused automatically.